
Branches
Last updated on 2026-07-15 | Edit this page
Overview
Questions
- What are branches?
- How do I view the current branches?
- How do I manipulate branches?
Objectives
- Understand how branches are created.
- Learn the key commands to view and manipulate branches.
Branching is a feature available in most modern version control
systems. Branching in other version control systems can be an expensive
operation in both time and disk space. In git, branches are
a part of your everyday development process. When you want to add a new
feature or fix a bug—no matter how big or how small—you spawn a new
branch to encapsulate your changes. This makes it harder for unstable
code to get merged into the main code base, and it gives you the chance
to clean up your future’s history before merging it into the main
branch.
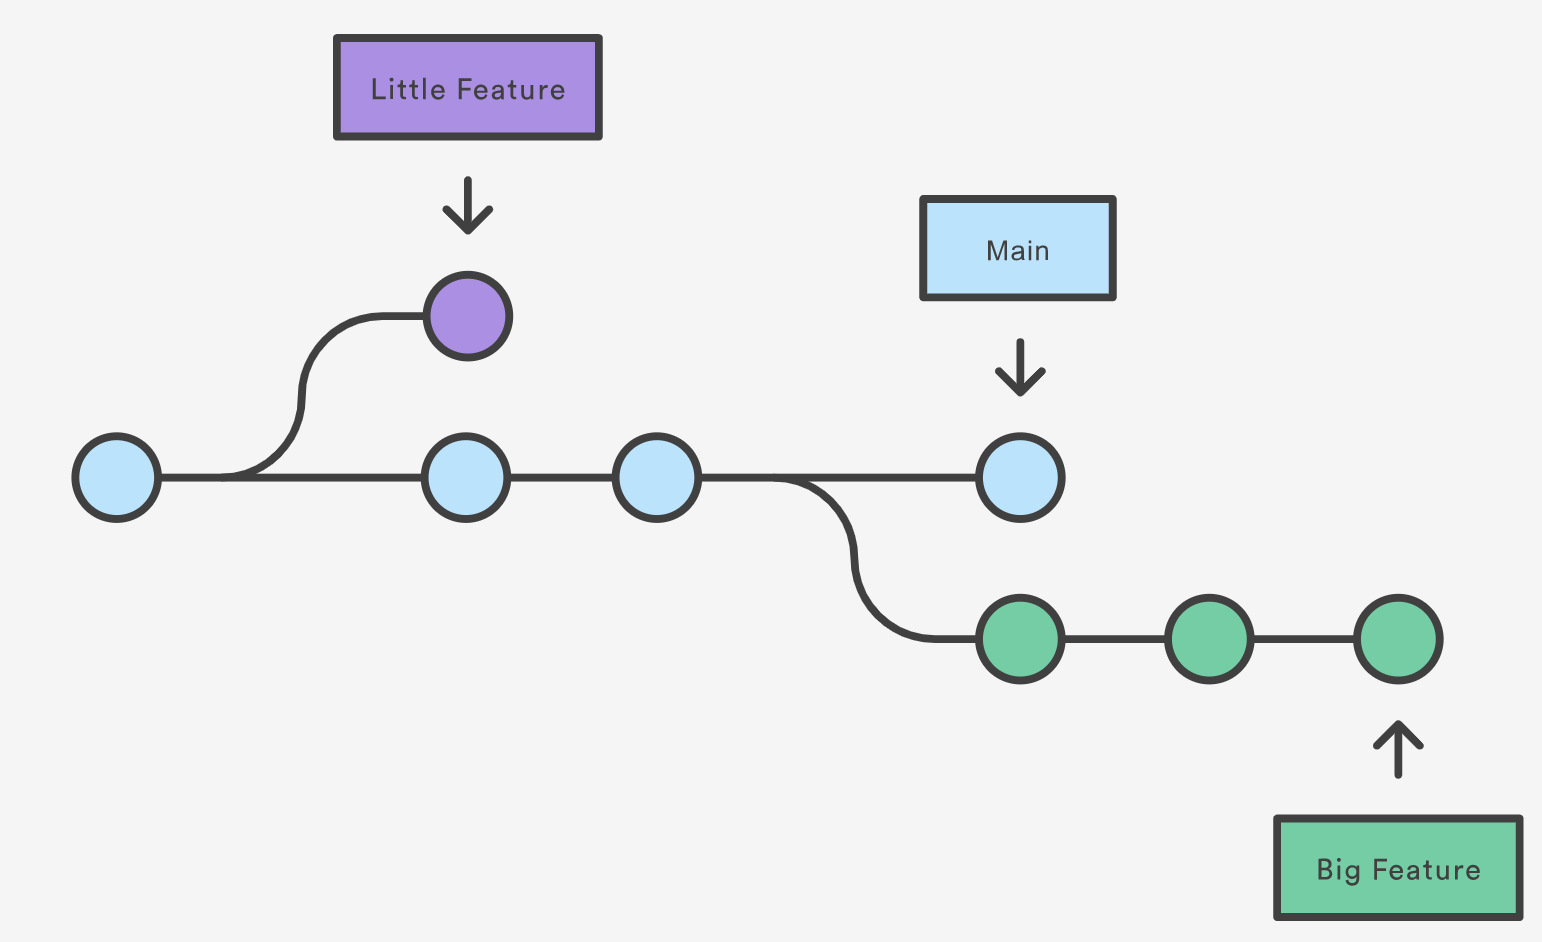
The diagram above visualizes a repository with two isolated lines of development, one for a little feature, and one for a longer-running feature. By developing them in branches, it’s not only possible to work on both of them in parallel, but it also keeps the main branch free from questionable code.
The implementation behind Git branches is much more lightweight than other version control system models. Instead of copying files from directory to directory, Git stores a branch as a reference to a commit. In this sense, a branch represents the tip of a series of commits—it’s not a container for commits. The history for a branch is extrapolated through the commit relationships.
What is a branch?
In git a branch is effectively a pointer to a snapshot
of your changes. It’s important to understand that branches are just
pointers to commits. When you create a branch, all Git needs to do is
create a new pointer, it doesn’t change the repository in any other way.
If you start with a repository that looks like this:
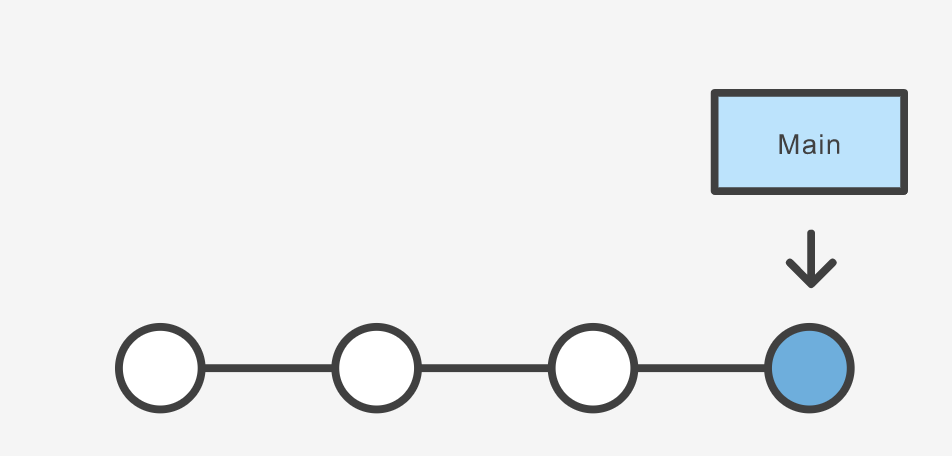
Let’s say we wanted to reworking our recipes to use a different format. We could continue on our existing branch, but we’re not so sure about this change, so instead we create a new branch to experiment with:
The repository history remains unchanged. All you get is a new pointer to the current commit:
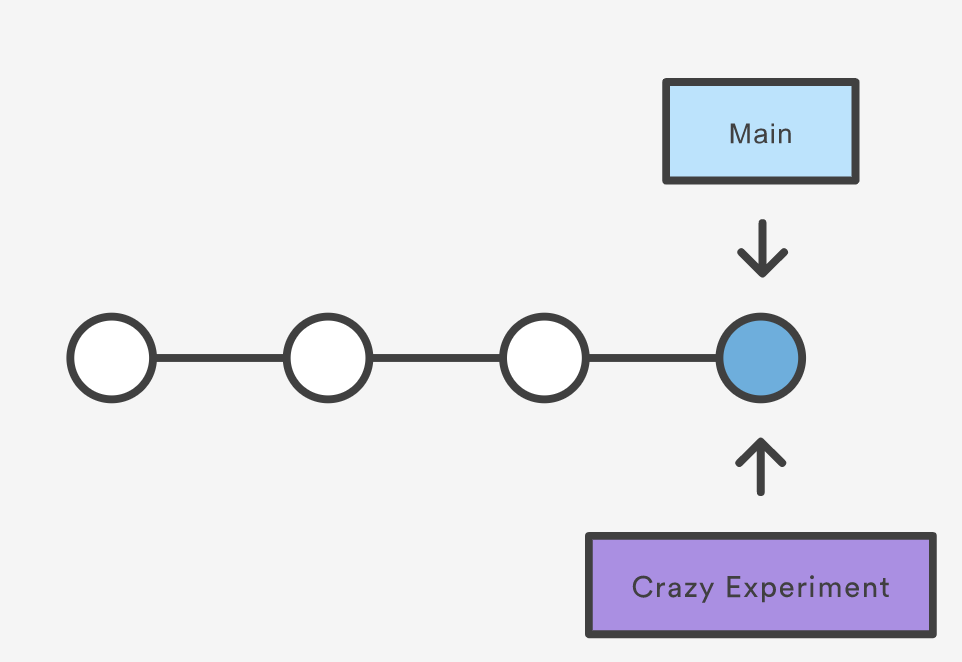
Note that this only creates the new branch. To start adding commits
to it, you need to move to it with git checkout, and then
use the standard git add and git commit
commands.
A branch also means an independent line of development. Branches serve as an abstraction for the edit/stage/commit process. New commits are recorded in the history for the current branch, which results in a fork in the history of the project. However, it is really important to remember that each commit only records the incremental change in the document and NOT the full history of changes. Therefore, while we think of a branch as a sequence of commits, each commit is independent unit of change.
Branching Commands
Creating, deleting, and modifying branches is quick and easy; here’s a summary of the commands:
To list all branches:
OUTPUT
$ git branch
* main
  yaml-format
The asterisk (*) indicates the current branch. To see
more information about each branch, including the latest commit on each
branch, use the -avv flags:
OUTPUT
$ git branch -avv
* main        ec240ab Ignore png files and the pictures folder.
  yaml-format ec240ab Ignore png files and the pictures folder.
We can see that, as we have not added any new commits to the
yaml-format branch, both branches point to the same commit
(ec240ab).
To create a new branch named <branch>, which
references the same point in history as the current branch.
To create a new branch named <branch>, referencing
<start-point>, which may be specified any way you
like, including using a branch name or a tag name:
To delete the branch <branch>; if the branch is
not fully merged in its upstream branch or contained in the current
branch, this command will fail with a warning:
To delete the branch <branch> irrespective of its
merged status:
Renaming a branch can be done with the -m tag:
Let’s switch over to our new branch so we can start making changes:
OUTPUT
$ git switch yaml-format
Switched to branch 'yaml-format'git switch was introduced in Git 2.23 as a more purpose
specific command for switching branches. It is functionally similar to
git checkout, which is still used widely, but is a more
general command with multiple purposes (switching branches, restoring
files, etc).
To create a new branch <new> referencing
<start-point>, and check it out.
The special symbol "HEAD" can always be used to refer to
the current branch. In fact, Git uses a file named HEAD in
the .git directory to remember which branch is current:
Let’s reformat our recipe to use YAML and commit the changes:
name: Guacamole
ingredients:
  avocado: 1.35
  lime: 0.64
  salt: 2
instructions: ""Now let’s check our branches again:
OUTPUT
$ git branch -avv
  main        ec240ab Ignore png files and the pictures folder.
* yaml-format a2b55be Reformat recipe to use YAML.
Challenge
Challenge 1: Renaming a file in a branch
We updated our guacamole recipe in the yaml-format
branch to use a different format. But now the file extension
.md doesn’t make sense anymore. Rename the file to
guacamole.yaml and commit the change to the
yaml-format branch. Run git status before you
commit your changes. Is there anything different about the way this
commit looks than in our earlier exercises?
OUTPUT
$ git status
On branch yaml-format
Changes to be committed:
  (use "git restore --staged <file>..." to unstage)
        renamed:    guacamole.md -> guacamole.yaml
Git is not very clever about most things, but as long as the contents of the file are identical, it can at least figure out that we just renamed the file, rather than deleting one and adding another.
Challenge
Challenge 2: Renaming a branch You realize the branch name
yaml-format is not descriptive enough. Rename it to
feature/yaml-format without losing any of your work.
You can check the documentation of git branch with
git branch --help
Challenge
Challenge 3: Deleting an Unmerged Branch
We think about adding new dessert recipes to our recipe collection. To avoid affecting the main branch we need to create a new branch named dessert-recipes and switch to this branch.
After that, we create a simple cookie recipe with the name cookies.md and commit it.
Later we decide that it’s not the right time to start with the dessert recipes and cookies and we don’t want the cookie recipe to remain in our repository.
What happens when we use git branch -d? Why does git react this way and how can we force the deletion?
Think about how you checked the documentation in the previous challenge.
BASH
git switch -c dessert-recipes
nano cookies.md

(add recipe content)

git add cookies.md
git commit -m "Add chocolate chip cookies recipe."
git switch main

git branch -d dessert-recipes
OUTPUT
$ git branch -d dessert-recipes
error: the branch 'dessert-recipes' is not fully merged
hint: If you are sure you want to delete it, run 'git branch -D dessert-recipes'
Git uses -d as a safety net - it will not delete a
branch that has not been merged into the current branch, as that would
mean losing commits that exist nowhere else. -D bypasses
this check and deletes the branch even if it is not merged.
OUTPUT
Deleted branch dessert-recipes (was <commit-hash>).- A branch represents an independent line of development.
-
git branchcreates a new pointer to the current state of the repository and allows you to make subsequent changes from that state. - Subsequent changes are considered to belong to that branch.
- The final commit on a given branch is its HEAD.